Somewhere in your home, there's a box or album filled with irreplaceable memories.
Your grandmother's wedding day.
Your parents holding you as a newborn.
Family gatherings from decades ago with relatives you barely remember.
And every single day, those photographs are slowly fading away.
Physical photos have a lifespan. Light exposure, humidity, temperature changes, and the simple passage of time cause colours to fade, paper to yellow, and images to deteriorate.
According to the Library of Congress, most colour photographs begin noticeable degradation within 20-30 years, even under good storage conditions.
Your family photos are on a countdown.
But here's the good news:
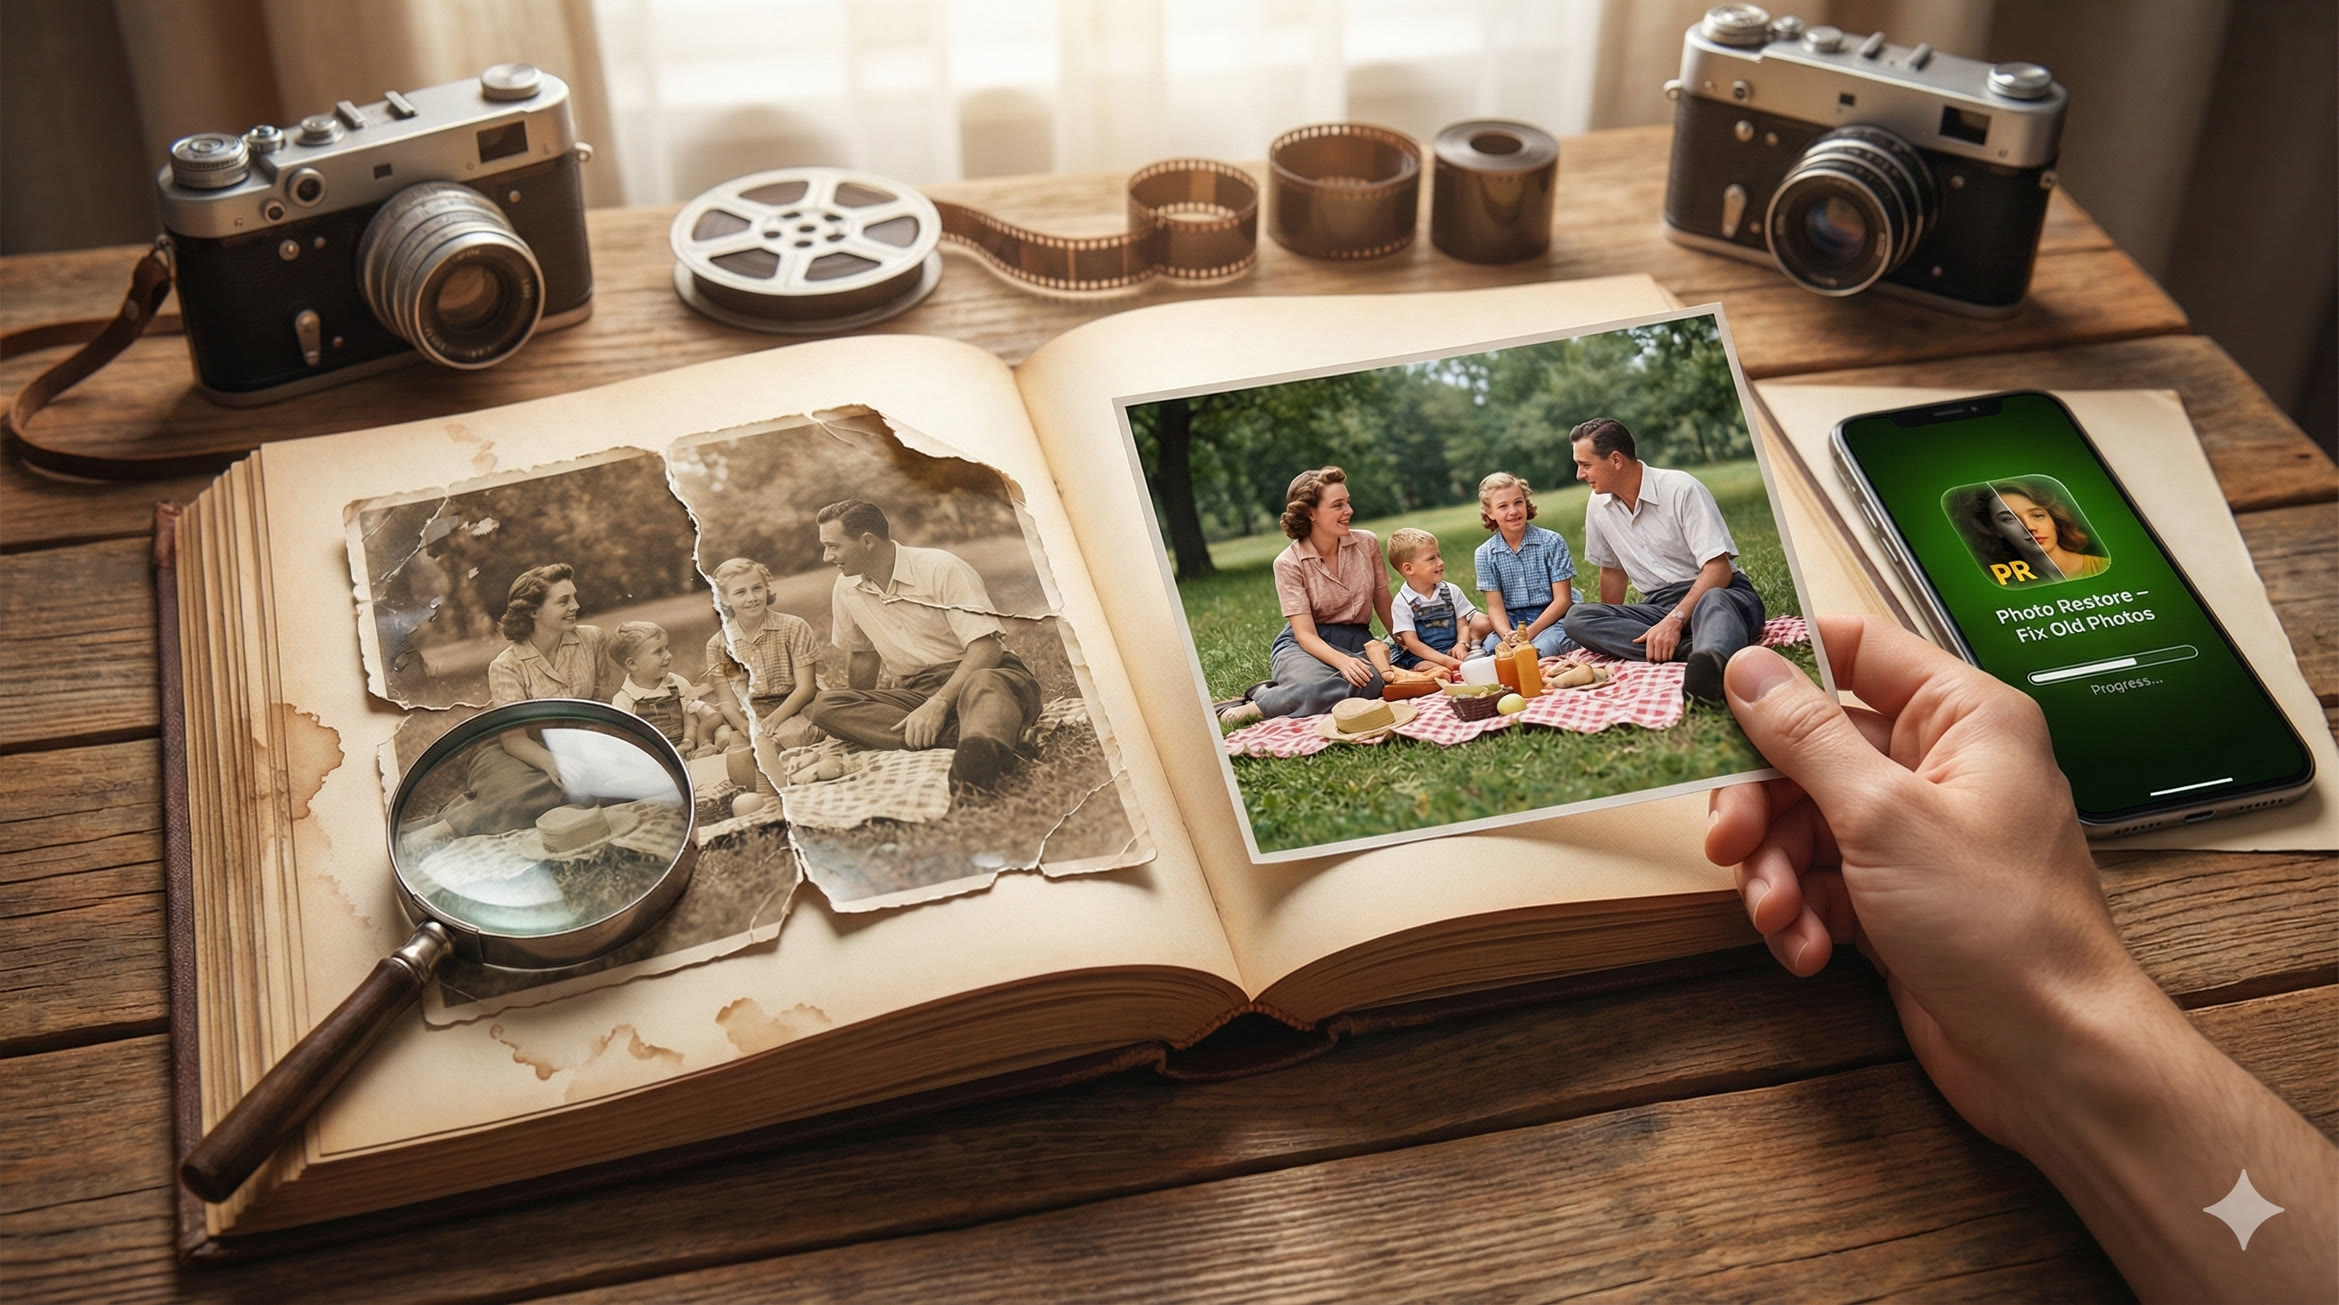
Digitizing and restoring your photo collection has never been easier or more accessible. With modern AI technology, you can not only preserve your photos digitally—you can actually make them look better than they've looked in decades.
This guide will walk you through the entire process, from preparing your albums to creating a permanent digital archive your great-grandchildren will treasure.
Why Digitize Your Family Photos Now?
Let's be real about what's at stake.
Physical Photos Are Fragile
Consider the threats to your photo collection:
- Fading: UV light causes continuous colour degradation
- Humidity: Moisture leads to mould, warping, and sticking
- Oxidation: Chemical reactions cause yellowing and browning
- Handling: Each touch transfers oils and accelerates wear
- Disasters: Floods, fires, and water damage are permanent
- Adhesive albums: "Magnetic" albums from the 70s-90s are actively destroying photos
Every year you wait, the starting point for restoration gets worse.
Digital Files Last Forever
Unlike physical photos, properly stored digital files don't degrade over time. A JPEG from 2026 will look identical in 2126—as long as you maintain backup copies.
Digital preservation means:
- No degradation: Files don't fade, yellow, or deteriorate
- Easy sharing: Send photos to family members instantly
- Multiple copies: Store backups in different locations
- AI enhancement: Improve quality beyond the original
- Searchability: Find specific photos quickly with organization
AI Restoration Is Revolutionary
Here's what changes everything:
Five years ago, restoring a damaged photograph required professional software skills or expensive services.
Today, AI can automatically:
- Remove scratches, tears, and creases
- Repair water damage and stains
- Enhance faded and blurry images
- Colorize black-and-white photographs
- Upscale low-resolution images
- Fill in missing or damaged sections
What would have cost £50-200 per photo at a professional restoration service can now be done on your iPhone in seconds.
For a detailed look at AI restoration specifically for vintage portraits, check out our complete guide to vintage family portrait restoration.
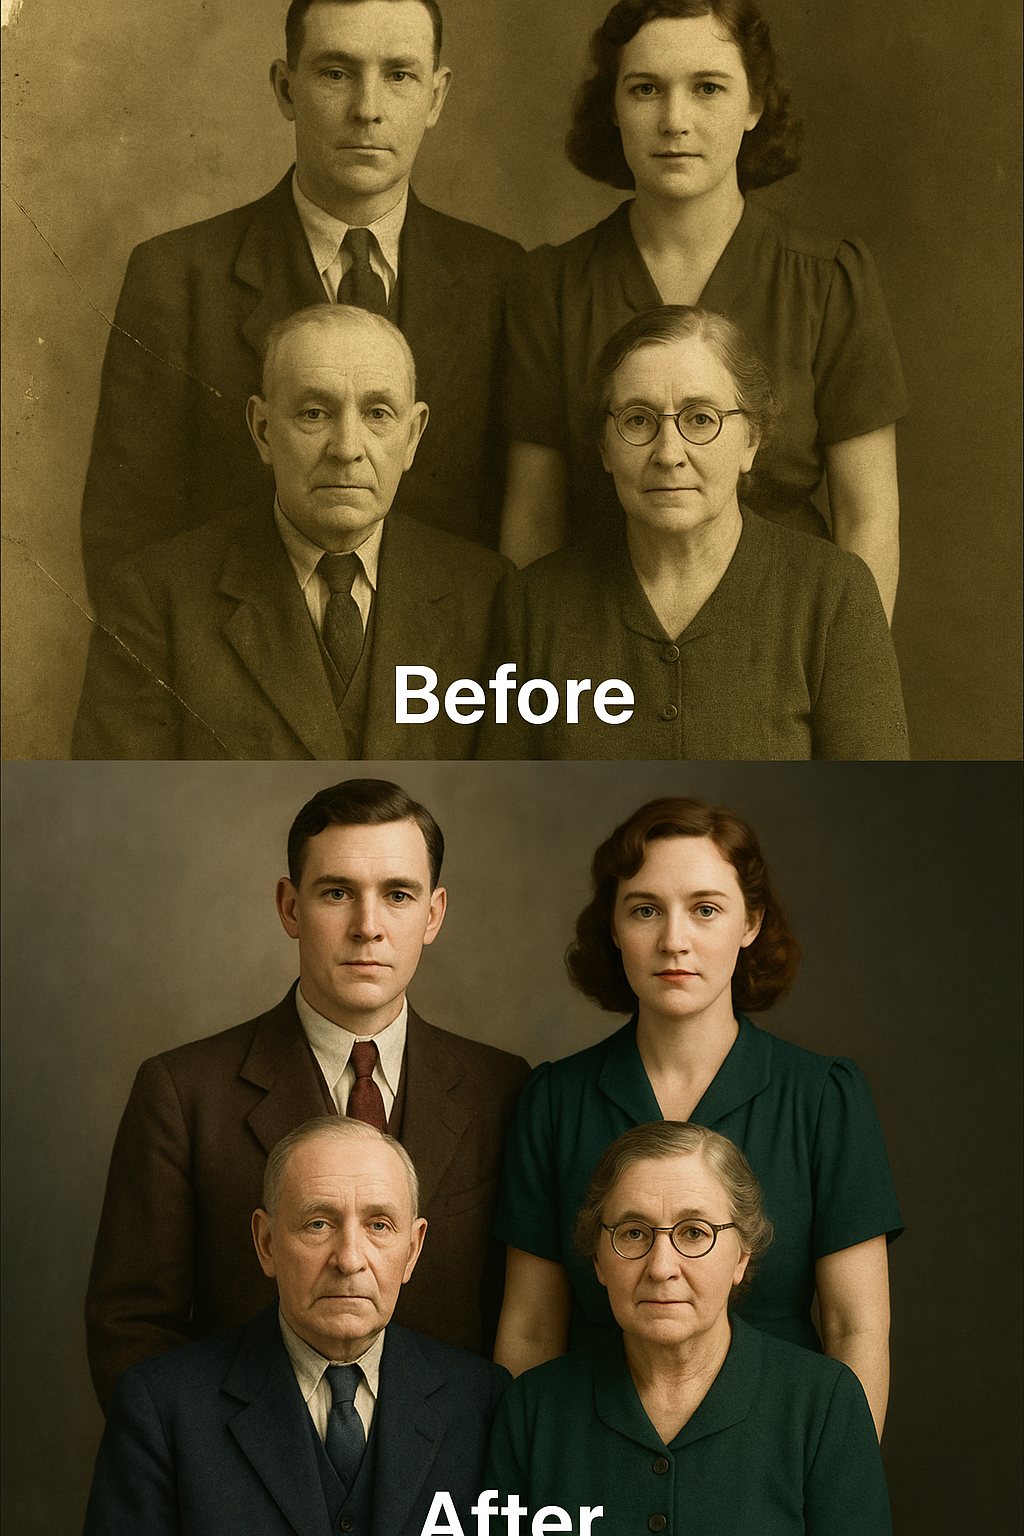
AI restoration in action: This early 1900s family portrait was faded, scratched, and missing detail. AI enhancement brought back clarity, removed damage, and revealed faces that hadn't been clearly visible in decades.
What You'll Need for This Project
Before diving in, gather your supplies:
Essential Equipment
📱 Smartphone with Good Camera
Any modern iPhone or Android phone works. For best results, clean the camera lens before starting.
💻 Computer (Optional)
Helpful for organizing large collections, but the entire process can be done on your phone.
🔲 Flatbed Scanner (Optional)
Produces highest quality scans, but smartphone cameras work surprisingly well for most purposes.
💡 Good Lighting
Natural daylight or a bright, even artificial light source. Avoid shadows across photos.
Software/Apps
- Photo Restore - Fix Old Photos: AI-powered restoration for scratches, fading, colorization, and enhancement
- Built-in Camera app: For capturing photos when scanning isn't possible
- Google Photos or iCloud: For backup and organization
Get the Photo Restoration App
Photo Restore uses advanced AI to remove scratches, enhance faded images, and colorize black-and-white photos in seconds. Free to try on iPhone and iPad.
Download Photo Restore →Step-by-Step: Digitize Your Photo Album
Step 1: Organize and Prepare Your Photos (1-2 hours)
Before you start scanning, spend time getting organized.
Sort by Era or Event
Group photos roughly by time period or occasion:
- Great-grandparents and earlier
- Grandparents' generation
- Parents' childhood and youth
- Your own childhood
- Major events (weddings, graduations, holidays)
This makes the digitization process more efficient and helps with organization later.
Assess Album Types
Different albums require different handling:
| Album Type | Handling |
|---|---|
| Magnetic/Adhesive Albums | Remove photos carefully—these albums damage photos over time. Use dental floss to gently separate stuck photos. |
| Slip-in Albums | Photos can often be scanned in place through the plastic sleeve, or removed easily. |
| Photo Corners | Gentlest storage method. Remove photos carefully without tearing corners. |
| Loose Photos in Boxes | Sort into piles, handle by edges only, and process in batches. |
⚠️ Warning: Stuck Photos
If photos are firmly stuck to album pages and won't release with gentle pressure, DO NOT force them. You'll tear the photo. Options: scan through the plastic/adhesive, carefully cut the album page and scan the whole unit, or consult a professional conservator for valuable images.
Handle Photos Properly
- Wash and dry hands before handling (or use cotton gloves)
- Hold photos by edges only—never touch the image surface
- Work on a clean, dry surface
- Avoid eating, drinking, or smoking near photos
Step 2: Capture Your Photos (Main Work)
You have two main options for digitizing: scanning or photographing.
Option A: Flatbed Scanner (Best Quality)
If you have access to a flatbed scanner:
- Resolution: 300 DPI for standard prints, 600 DPI for small photos or if you want to enlarge
- Format: TIFF for archival quality, JPEG at high quality (90%+) for practicality
- Color mode: Color (even for B&W photos—it captures more detail)
- Clean the glass: Dust and smudges show up in every scan
Pro tip: Scan multiple small photos at once, then crop them individually later to save time.
Option B: Smartphone Camera (Most Accessible)
No scanner? Your phone camera works surprisingly well:
- Lighting: Use natural daylight or two light sources on opposite sides to avoid shadows
- Position: Hold phone directly above the photo, parallel to the surface
- Stability: Brace your elbows or use a phone stand/tripod
- Fill the frame: Get close enough that the photo fills most of the screen
- Check sharpness: Tap to focus and verify the image is crisp
💡 Smartphone Scanning Apps
Apps like Google PhotoScan, Microsoft Lens, or the built-in iOS document scanner can automatically detect photo edges, correct perspective, and reduce glare—significantly improving smartphone capture quality.
Batch Processing Strategy
For large collections (100+ photos), work in batches:
- Process 20-30 photos per session to avoid fatigue-related quality issues
- Take breaks every 30-45 minutes
- Immediately transfer photos to your computer or cloud storage after each batch
- Maintain consistent lighting and positioning throughout each session
Step 3: Restore Damaged Photos with AI
This is where modern technology transforms your project.
Once photos are digitized, use the Photo Restore app to repair damage and enhance quality.
What AI Can Fix
Scratches & Creases
AI identifies and removes linear damage while preserving underlying detail.
Fading & Discoloration
Restores original colour balance and contrast to washed-out images.
Blurriness
Sharpens soft focus and enhances detail that appeared lost.
Tears & Missing Sections
Intelligently fills in damaged areas based on surrounding content.
Water Damage & Stains
Removes spotting and discoloration from liquid exposure.
Low Resolution
Upscales small or low-quality images with added detail.
How to Use Photo Restore
- Import: Open the app and select a photo from your camera roll
- Restore: Tap the restore button—AI analyzes and repairs damage automatically
- Compare: Use the before/after slider to see the transformation
- Enhance: Apply additional improvements like sharpening or contrast
- Colorize: For black-and-white photos, apply AI colorization
- Save: Export the restored version to your camera roll
The entire process takes about 10-30 seconds per photo.
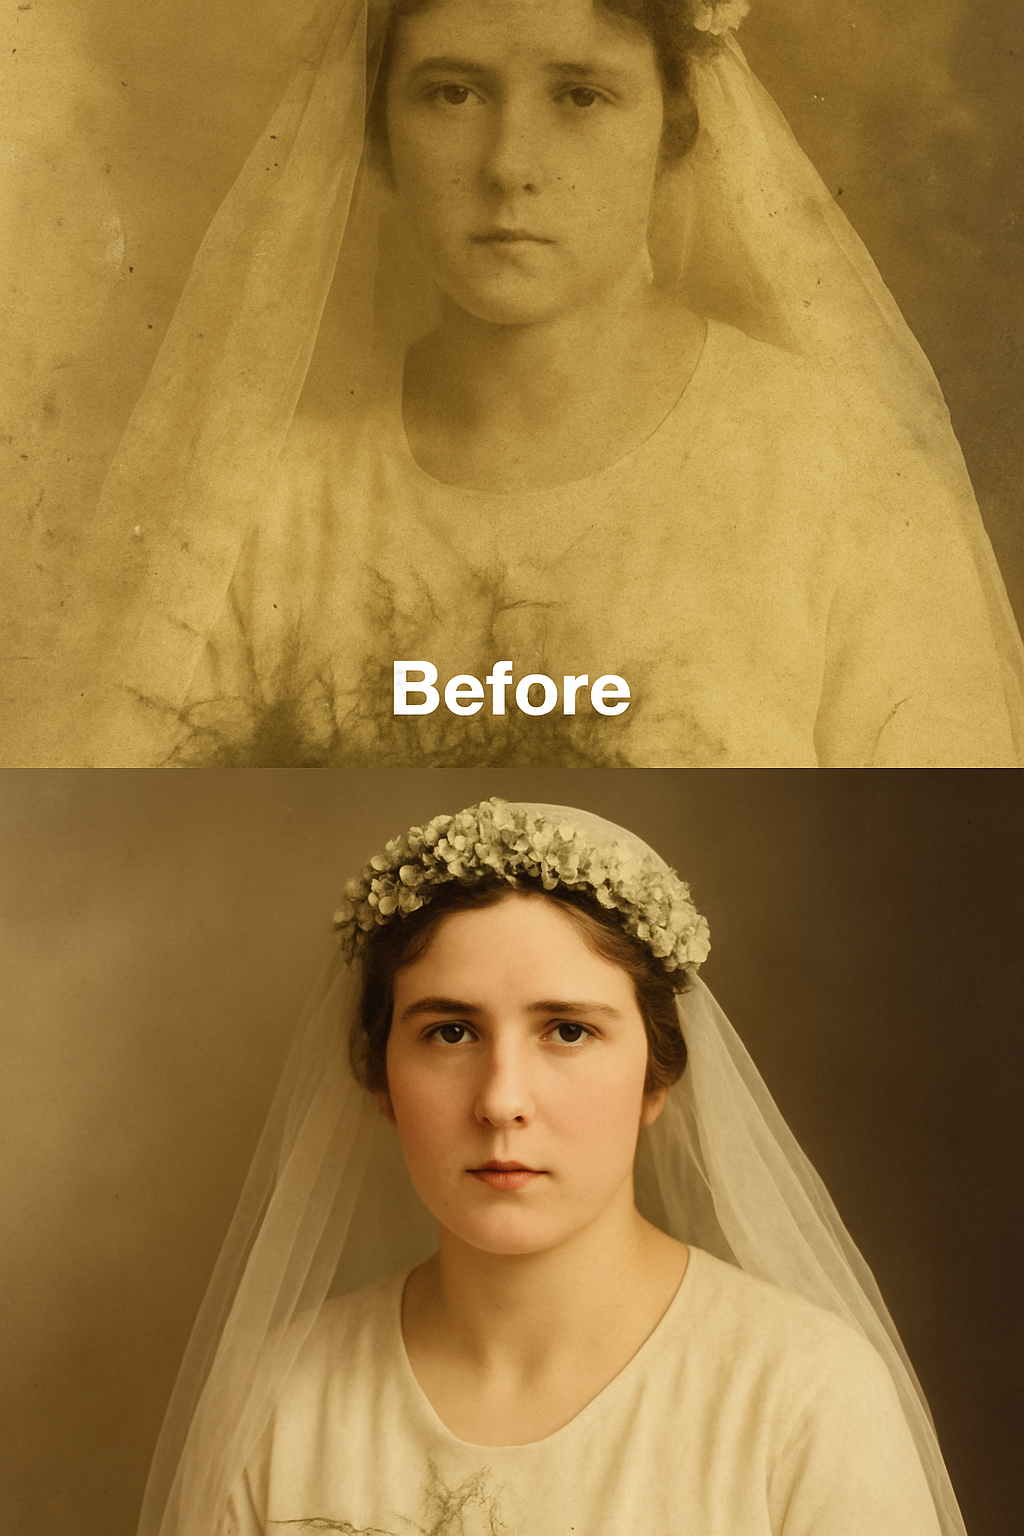
Wedding portrait restoration: This 1920s wedding photo was heavily faded with scratches and water damage. AI restoration recovered remarkable detail in faces and clothing while removing decades of damage.
Step 4: Colorize Black-and-White Photos (Optional)
One of the most magical capabilities of AI is adding realistic colour to historical black-and-white photos.
Colorization transforms how we connect with old images. Suddenly, great-great-grandparents look like real people rather than historical artifacts.
When to Colorize
- Family portraits: Brings ancestors to life
- Historical events: Makes history feel immediate
- Photos you'll display: Colorized prints often resonate more with family
When to Keep Black & White
- Archival purposes: Always keep the original B&W version
- Artistic preference: Some photos are more powerful in monochrome
- Historical accuracy: If colour accuracy is important, note that AI colorization is an educated guess
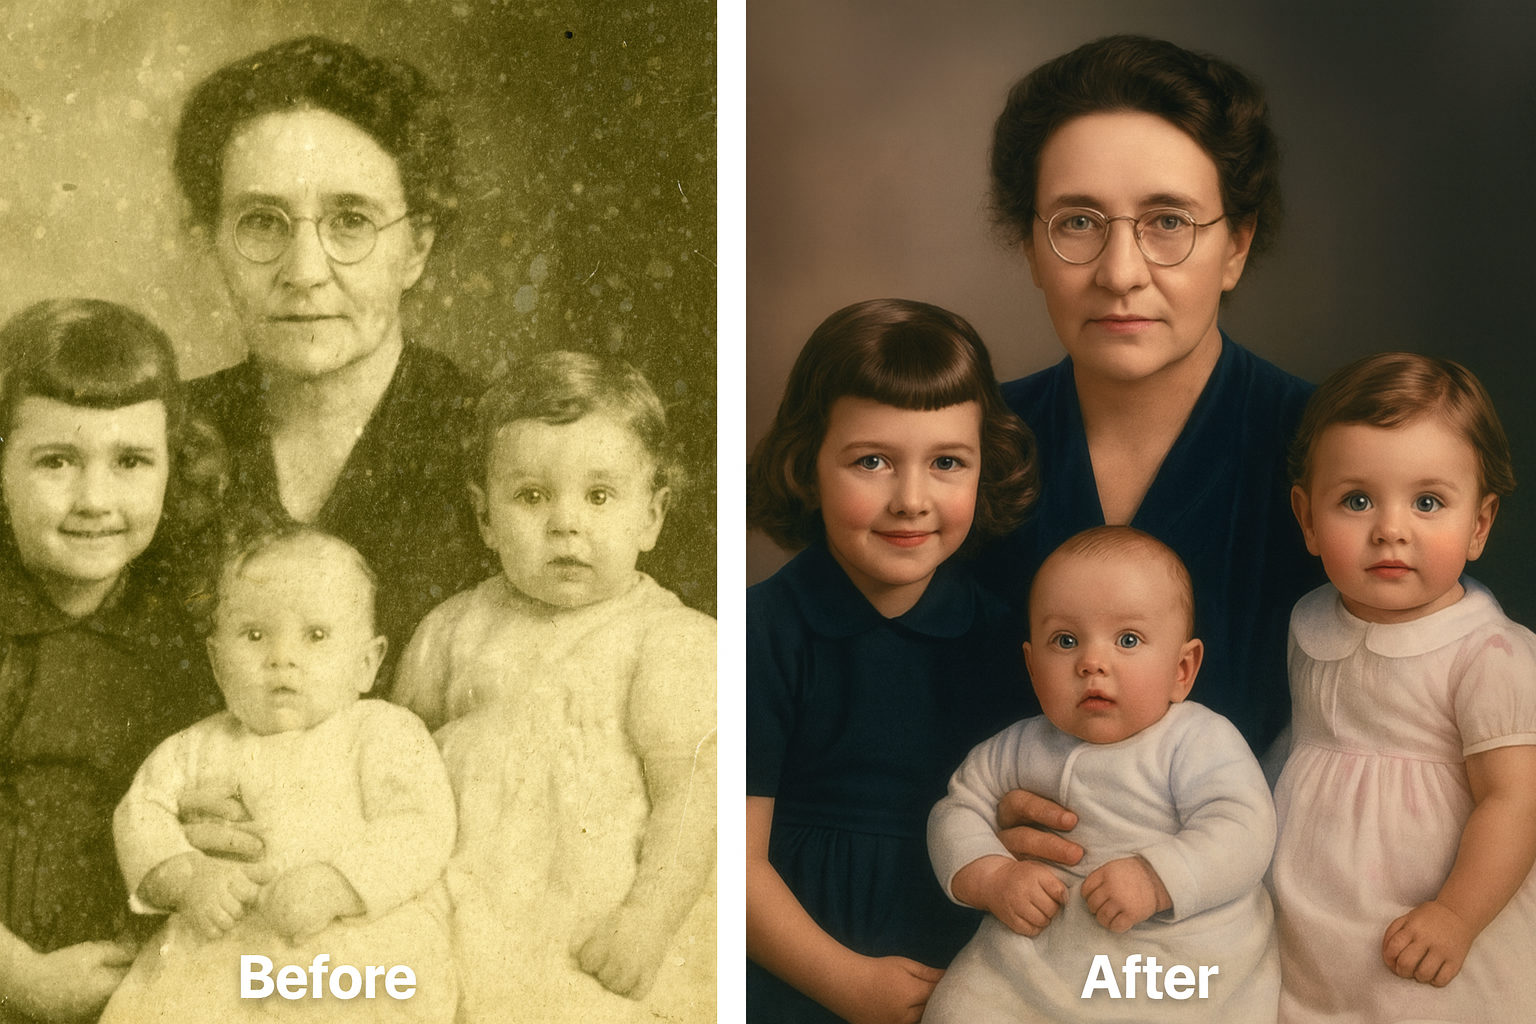
AI colorization: This 1940s family gathering was colorized using AI. While colours are interpretive (the AI can't know the actual dress colours), the result brings remarkable life to the image.
Best practice: Save both versions—the restored black-and-white AND the colorized version. Never overwrite your original scans.
Step 5: Organize Your Digital Archive
Congratulations—you have digital copies! Now organize them so they're actually usable.
Folder Structure
Create a logical hierarchy:
Family Photos/
├── 1900-1940 Great-Grandparents/
│   ├── [Name] Family/
│   └── [Name] Family/
├── 1940-1970 Grandparents/
│   ├── Wedding 1952/
│   └── Family Gatherings/
├── 1970-1990 Parents/
│   ├── Childhood/
│   └── Wedding 1985/
├── 1990-2010 My Childhood/
└── Restored Versions/
    ├── Colorized/
    └── Enhanced/
File Naming Convention
Use consistent, descriptive filenames:
YYYY_Event_People_SequenceNumber.jpg
Examples:
1952_Wedding_GrandmaGrandpa_001.jpg1975_Christmas_SmithFamily_003.jpg1940_Portrait_GreatGrandmother_001.jpg
Add Metadata
If possible, add information to your photos' metadata or in a separate spreadsheet:
- Date (exact or approximate)
- Location
- People pictured (left to right)
- Event or occasion
- Who provided the photo
- Any stories associated with it
Interview elderly relatives NOW. They're the only source for identifying people and stories. This information is as valuable as the photos themselves.
Step 6: Back Up Everything (Critical!)
Digital files don't degrade, but they can be lost. Proper backup is essential.
The 3-2-1 Backup Rule
- 3 copies of your data
- 2 different storage types (e.g., hard drive + cloud)
- 1 copy offsite (cloud or at a relative's house)
Recommended Backup Strategy
- Primary: Your computer's hard drive or phone storage
- Local backup: External hard drive (keep in a different room from your computer)
- Cloud backup: Google Photos, iCloud, Dropbox, or dedicated backup services
💡 Free Cloud Storage Options
Google Photos: 15GB free (shared with Gmail/Drive). iCloud: 5GB free with Apple devices. Amazon Photos: Unlimited photo storage with Prime membership.
Ready to Start Your Photo Preservation Project?
Download Photo Restore and begin transforming your family's visual heritage. AI restoration makes damaged photos look better than they have in decades.
Download Photo Restore Free →Sharing Your Digital Archive with Family
Part of the joy of this project is sharing it with family.
Sharing Options
- Shared cloud album: Create a Google Photos or iCloud shared album that family members can access
- Digital frame gift: Load restored photos onto digital picture frames for elderly relatives
- Photo book: Create printed photo books featuring restored images (great gifts!)
- Family website: Set up a private website or blog documenting your family history
- USB drives: Create copies for family members who prefer offline access
Collaborative Identification
Share unidentified photos with family members—someone may recognize people or places you don't. Create a shared document or group chat for collaborative detective work.
Frequently Asked Questions
Should I remove photos from albums before scanning?
It depends. Photos in magnetic/adhesive albums should be carefully removed as these materials damage photos over time. Photos in slip-in albums can often be scanned through the plastic. If photos are firmly stuck, don't force removal—you'll cause more damage than leaving them in place. Scan through the plastic or consult a professional for valuable images.
What resolution should I scan at?
300 DPI is sufficient for most photos at their original size. Use 600 DPI for very small photos (wallet-sized), damaged photos you want to enlarge, or maximum archival quality. Higher resolution means larger files but captures more detail for AI restoration to work with.
How do I handle photos stuck together?
Never try to peel stuck photos apart—you'll destroy both. If photos are lightly stuck, try placing them in a humid environment (near a running shower) for 30 minutes, then attempt gentle separation. For firmly stuck photos, scan them as-is or consult a professional conservator.
Can AI fix severely damaged photos?
AI restoration has become remarkably capable. It can repair scratches, tears, fading, water damage, and even fill in small missing sections. However, if more than 50% of a face or critical area is destroyed, results may be limited. The technology improves constantly—even if a photo can't be fully restored today, future AI may do better.
How accurate is AI colorization?
AI colorization is an educated guess based on training data. It's remarkably good at natural elements (skin tones, grass, sky) but may guess incorrectly on clothing colours or specific details. Think of colorized photos as artistic interpretations rather than historical records. Always keep the original black-and-white version.
What file format should I save restored photos in?
For archival purposes, TIFF or PNG (lossless formats) are ideal but create large files. For practical use, high-quality JPEG (90%+) is fine and keeps file sizes manageable. The Photo Restore app exports in standard formats compatible with all devices and cloud services.
How long does a full album project take?
Expect roughly 1-2 minutes per photo for scanning/photographing, plus 30 seconds per photo for AI restoration. A 200-photo album might take 6-8 hours spread across multiple sessions. Don't rush—quality matters more than speed for preservation purposes.
Start Preserving Your Family's Visual Legacy
Those photos in your closet represent your family's irreplaceable visual history.
Every wedding, every birthday, every ordinary Sunday afternoon captured on film—these moments connect you to people who came before and preserve stories for people who come after.
The technology to preserve and enhance these images has never been more accessible.
The process has never been simpler.
And every day you wait, those original photos continue to fade.
You don't need to complete your entire collection in one weekend. Start with one album. One box. One generation.
Scan a few photos. Restore them with AI. See faces you haven't seen clearly in years emerge from the damage.
That moment—when a blurry, faded photograph suddenly reveals your grandmother's smile in perfect clarity—that's what makes this project worth every minute.
Your family's memories deserve to survive. Start preserving them today.
Begin Your Photo Preservation Journey
Download Photo Restore and start transforming your family's precious memories. AI-powered restoration makes damaged photos look better than they have in decades—and it only takes seconds per image.